Volumetric Rendering Part 2
How to render a Volume
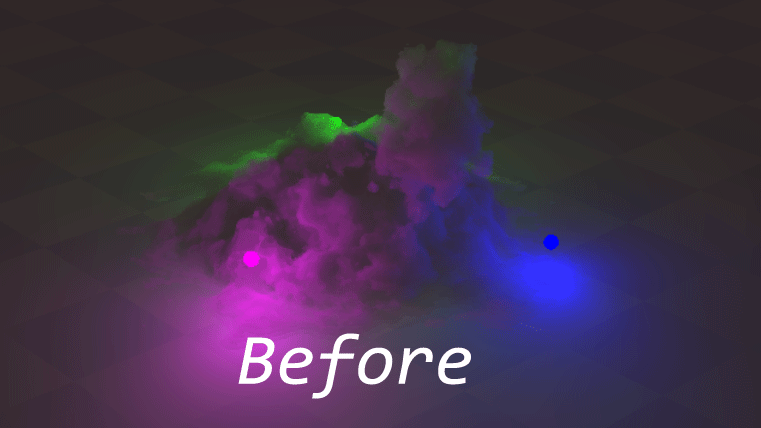
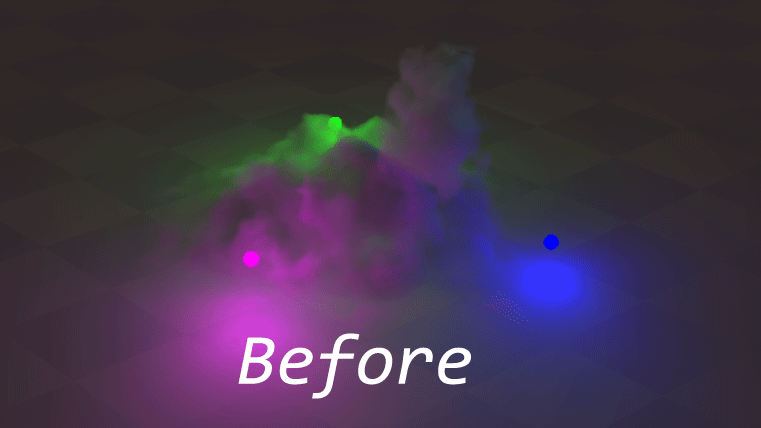
In part 1 we talked about how to generate a cloud like volume using SDFs. We left off with this:
So how do we render this as a volume rather than an opaque? Lets talk about the physics we are simulating here first. A volume represents a large amount of particles within some span of space. And when I say large amount, I mean a LARGE amount. Enough that representing those particles individually is unfeasible today, even for offline rendering. Things like fire, fog, and clouds are great examples of this. In fact, everything is technically volumetric, but for performance reasons, it’s easier to assume turn a blind eye and assume they’re not. We represent aggregation of those particles as density values, generally in some 3D grid (or something more sophisticated like OpenVDB).
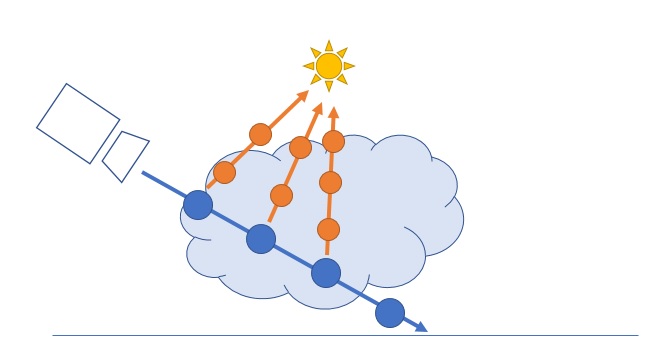
When light is going through a volume, a couple things can happen when light hits a particle. It can either get scattered and go off in another direction, or some of the light can get absorbed by the particle and diffused out. In order to stay within the constraints of real-time, we will be doing what’s called single scattering. What this means is that we assume that we assume light only scatters once when the light hits a particle and flies towards the camera. This means we won’t be able to simulate multiscattering effects such as fog where things in the distance tend to get blurrier. But for our purposes that’s okay. Here’s a visual of what single scattering looks like with ray marching:
The pseudo code for this looks something like this:
for n steps along the camera ray:
   Calculate what % of your ray hit particles (i.e. were absorbed) and needs lighting
   for m lights:
      for k steps towards the light:
         Calculate % of light that were absorbe in this step
      Calculate lighting based on how much light is visible
Blend results on top of opaque objects pass based on % of your ray that made it through the volume
So we’re talking about something with O(n * m * k) complexity. So buckle up, your GPU’s about to get a little toasty.
Calculating absorption
So first lets just tackle absorbtion of light in a a volume just along the camera ray (i.e. lets not march towards lights..yet). To do that, we need to do 2 things:
- Ray march inside a volume
- Calculating absorption/lighting at each step
To calculate how much light gets absorbed at each point, we use the Beer-Lambert Law, which describes light attenuation through a material. The math for this is surprisingly simple:
float BeerLambert(float absorptionCoefficient, float distanceTraveled)
{
    return exp(-absorptionCoefficient * distanceTraveled);
}
The absorptionCoefficient is a parameter of the material. For example in a clear volume like water, this value would be low, but for something thicker like milk, you’d have a higher coefficient.
To ray march, the volume. We just take a fixed sized steps along the ray and get the absorption at each step. It might not be clear why we need to take fixed steps yet vs something faster like sphere tracing, but once density isn’t uniform within the volume, that will become clearer. Here’s what the code for ray marching and accumulating absorption looks like below. Some variable are outside of this code snippet but feel free to refer to the ShaderToy for the complete implementation.
float opaqueVisiblity = 1.0f;
const float marchSize = 0.6f;
for(int i = 0; i < MAX_VOLUME_MARCH_STEPS; i++) {
	volumeDepth += marchSize;
	if(volumeDepth > opaqueDepth) break;

	vec3 position = rayOrigin + volumeDepth*rayDirection;
	bool isInVolume = QueryVolumetricDistanceField(position) < 0.0f;
	if(isInVolume) 	{
		float previousOpaqueVisiblity = opaqueVisiblity;
		opaqueVisiblity *= BeerLambert(ABSORPTION_COEFFICIENT, marchSize);
		float absorptionFromMarch = previousOpaqueVisiblity - opaqueVisiblity;
		for(int lightIndex = 0; lightIndex < NUM_LIGHTS; lightIndex++) {
			float lightDistance = length((GetLight(lightIndex).Position - position));
			vec3 lightColor = GetLight(lightIndex).LightColor * GetLightAttenuation(lightDistance);
			volumetricColor += absorptionFromMarch * volumeAlbedo * lightColor;
		}
		volumetricColor += absorptionFromMarch * volumeAlbedo * GetAmbientLight();
	}
}
And this is what that gets you:
It looks like cotton candy! And perhaps for some effects, this actually could be good enough! But what’s missing here is self shadowing. Light is reaching all parts of the volume equally. But that’s not physically correct, depending on how much volume is between the point being rendered and the light, you will have different amounts of incoming light.
Self shadowing
At this point, we’ve actually already done all the hard work. We need to do the same thing we did to calculate absorption along the camera ray, but just along the light ray. The code for calculating how much light reaches each point is basically duplicated code but duplicating is easier than hacking HLSL to get the kind of recursion we’d want. So here’s what that looks like:
float GetLightVisiblity(in vec3 rayOrigin, in vec3 rayDirection, in float maxT, in int maxSteps, in float marchSize) {
    float t = 0.0f;
    float lightVisiblity = 1.0f;
    for(int i = 0; i < maxSteps; i++) {
        t += marchSize;
        if(t > maxT) break;

        vec3 position = rayOrigin + t*rayDirection;
        if(QueryVolumetricDistanceField(position) < 0.0) {
            lightVisiblity *= BeerLambert(ABSORPTION_COEFFICIENT, marchSize);
        }
    }
    return lightVisiblity;
}
And adding self shadowing gets us this:
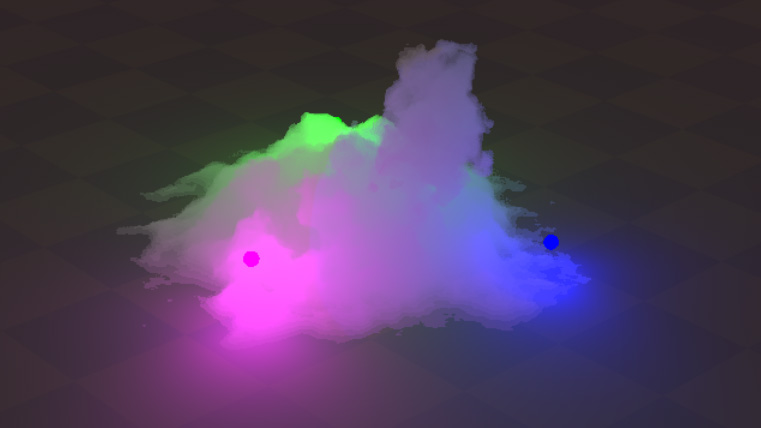
Soften edges
At this point, I was actually feeling pretty good about my volume. I showed this off to our talented VFX lead at The Coalition, James Sharpe, for some feedback. He immediately caught that the edges of the volume looked way to hard. Which is completely true, for things like clouds, they’re constantly diffusing with the space around them and so the edges are blending with the empty space arount the volume that should lead to really soft edges. James suggested a great idea of lowering density based how close you are to the edge. Which, because we’re working with signed distance functions, is really easy to do! So lets add a function we can use to query density at any point in the volume:
float GetFogDensity(vec3 position)
{
    float sdfValue = QueryVolumetricDistanceField(position)
    const float maxSDFMultiplier = 1.0;
    bool insideSDF = sdfDistance < 0.0;
    float sdfMultiplier = insideSDF ? min(abs(sdfDistance), maxSDFMultiplier) : 0.0;
    return sdfMultiplier;
}
And then we just fold this into our absorption value:
opaqueVisiblity *= BeerLambert(ABSORPTION_COEFFICIENT * GetFogDensity(position), marchSize);And here’s how that looks:
Density Function
And now that we have a density function we’re using, it become easy to add some noise into the volume that will give us a little extra detail and fluff to the volume. In this case, I just re-use the fBM function we used for tweaking wit the volume’s shape.
float GetFogDensity(vec3 position)
{
    float sdfValue = QueryVolumetricDistanceField(position)
    const float maxSDFMultiplier = 1.0;
    bool insideSDF = sdfDistance < 0.0;
    float sdfMultiplier = insideSDF ? min(abs(sdfDistance), maxSDFMultiplier) : 0.0;
   return sdfMultiplier * abs(fbm_4(position / 6.0) + 0.5);
}
And with that, we’re here:

Opaque Self Shadowing
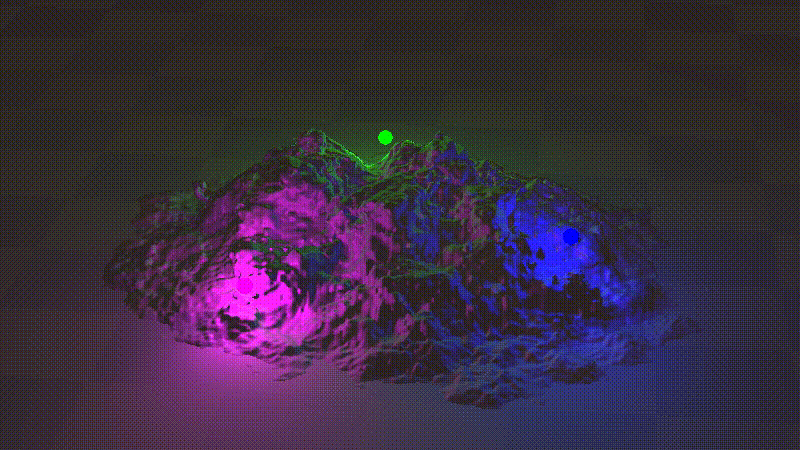
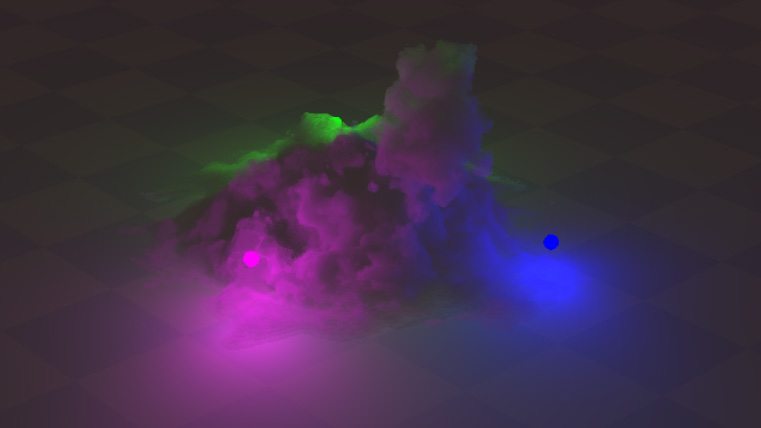
The volume is looking pretty good at this point! One thing is that there’s still some light leaking through the volume. Here we see green light leaking somewhere where the volume definitely should be occluded by the volume:
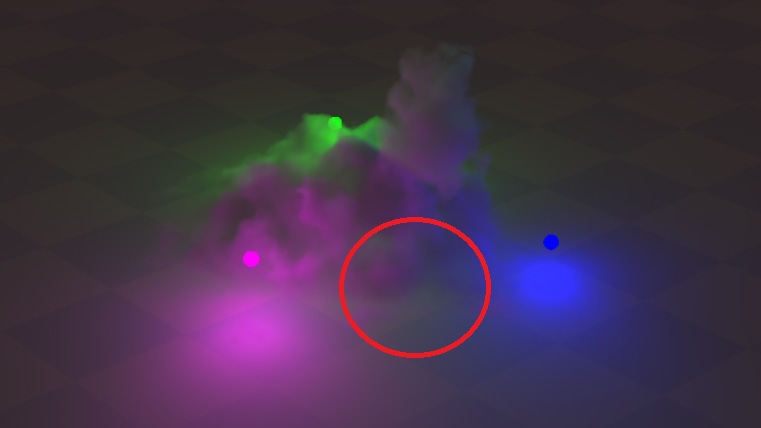 This is because opaque objects are rendered before the volume is rendered, so they don’t take into account shadowing that should happen from the volume. This is pretty easy to fix, we have a GetLightVisiblity function that we can use to calculate shadowing, so we just need to call this for our opaque object lighting. With that we get this:
In addition to getting some really nice colored shadows, it also really helps ground the shadow and sell the volume as a part of the scene. In addition, we get soft shadows even though we’re technically working with point lights thanks to the soft edges in the volume. And that’s it! There’s certainly more I could have done but this felt like it hit the visual bar I wanted for a sample I wanted to keep relatively simple.
Optimizations
At this point, this blog is running a little long but I’d make some quick mentions of some optimizations:
- Before marching towards a light, verify that a reasonable amount of light even reachs that point based on light falloff. In my implementation, I look at the luminosity of the light multiplied by the material albedo and make sure it’s a big enough value to justify ray marching.
- If almost all the light has been absorbed by the volume, terminate early, don’t wast time marching for no visible gain
- Defer the lighting of opaque objects until after marching the volume. If all the light was absorbed by the volume, you can skip the lighting of the opaque. You still want to calculate the depth of your opaques first though so you can early out of volume ray marching once you hit an opaque.
Conclusions
That’s about it! Personally I was surprised how you can get something fairly physically-based with a relatively small amount of code (~500 lines). Thanks for reading, hopefully it was mildly interesting. If you have questions, feel free to reach out to me on Twiter.
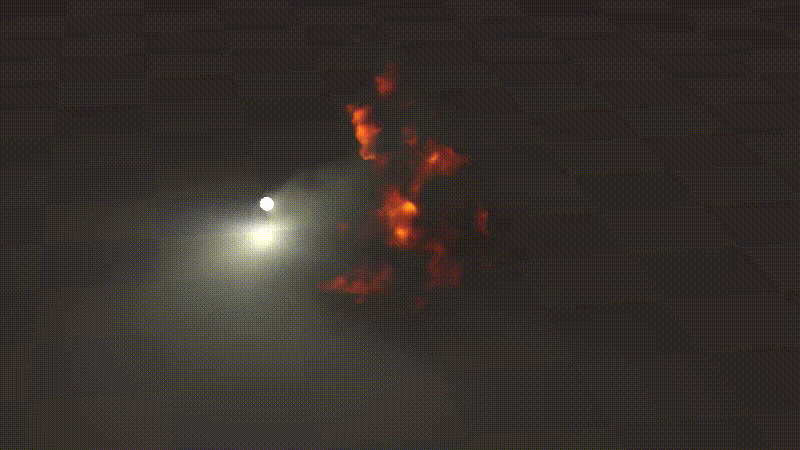
Oh and one more thing, here’s a fun tweak where I add emissive based on the SDF distance to make an explosion effect. Because we could always use more explosions.